

Early this year, I had seen a hot pink framed white board. Of course, I never pinned it. But the idea of it began jumping around in my mind and I knew I had to make it. I found a pretty scroll frame from Michaels which I painted hot pink. I measured it and bought a white board online.

The whiteboard was supposed to be the perfect size. But it turns out it was only perfect with the metal frame that looked really ugly peeking out from the wood frame. So I made a gut reaction and ripped it off.

And guess what? It was too small. Imagine a month passing. I found a photo matte that was the perfect size, it just needed to be cut so that the opening was bigger. I decided to try to do it on my Silhouette. It went horribly wrong. I didn't even take any pictures of it. I didn't have a good grip on the matte so it slid all over the place. I was so angry I threw it out and let the frame sit for at least another month.
Then I went the Michaels the other week and I saw the scroll frame. It just screamed at me - you have to finish me!! So I decided to compromise on my original goal of a framed whiteboard. I bought a smaller 'tile' white board and a roll of cork-board (I've spent A LOT on this project by now, you can imagine).
I don't think I took any pictures of this part because I was sure it wasn't going to work. I glued the whiteboard to the left side of the frame with E-600. Then I cut the whiteboard I had already purchased to fit the rest of the frame so nothing peaked out and I fit it with cork-board and glued that on. Then I glued the new cork-board to the frame and to the adjacent whiteboard. I was left with a not so pretty gap.
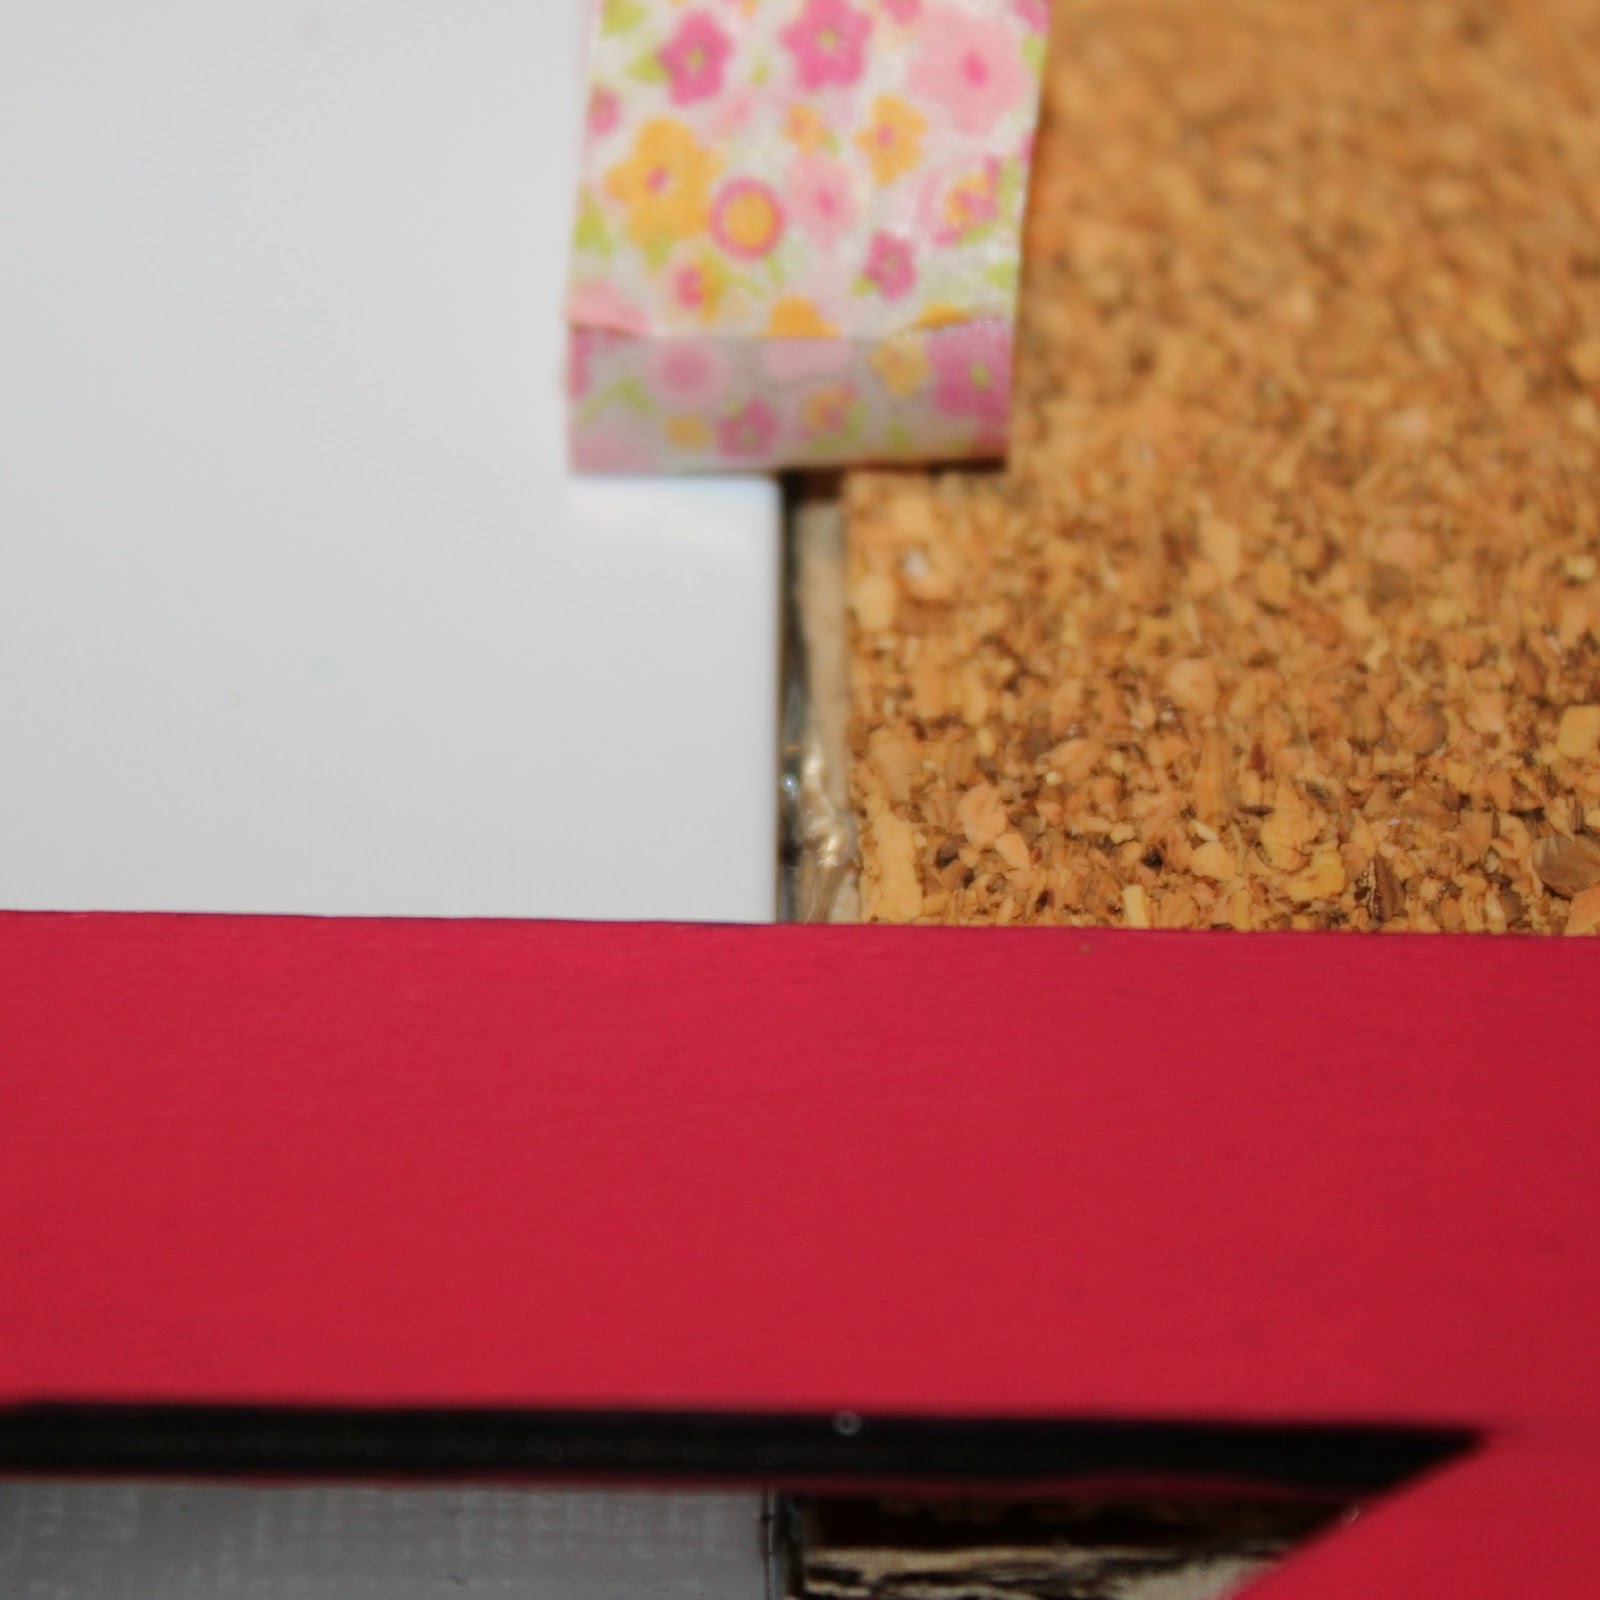
I decided to cover it with washi tape. I double layered it since washi tape can be fairly see-through. Then I coated the washi tape with a bit of Mod Podge since it wasn't sticking too great. The back of the frame isn't even so to hang it, I tied some string around the frame to hang it up. I think I might try to figure out a way to change that eventually.

I seriously can't believe it works. I don't even want to think about how much I've spent on this project to make it work. I mean, whenever I bought something for it, I usually have a coupon but if I had to wager a guess, I'd say $17 on the two whiteboards, $15 on the cork-board (but I've got a whole huge roll leftover - anyone got cork-board project ideas??), $4 on the frame, and $3 on the photo matte. So...about $40. Wow. Talk about determination. If I had done it like this originally, I probably could have done it for $25 (but, again, a whole roll of cork-board left over).

I hot glued the marker holder onto the frame and added some pushpins and magnets. It's already been a huge help just to jot down things I need to remember.

I still can't believe it's done. I'm kind of waiting for it to just fall off the wall and smash into a million pieces. This had me so frustrated. I still can't believe I'd spent so much money on it. I guess I can just chalk it up to a learning experience...right?!
It's super cute!! I love the red color and the fun frame! Thanks for the tutorial! Love it!! Pinning it!!
ReplyDeleteThank you! I'm glad you like it!
DeleteWell after all that it looks great! I have a little project like that in my garage. It is seriously an hour away from being complete but it has caused me so much grief I cannot look at it! Someday :)
ReplyDeleteThanks for sharing.
Sarah
www.creativeramblingsblog.com
I hope you finish your project too!
DeleteReally cute - love the red frame. Thanks for sharing.
ReplyDeleteIsn't it amazing how a splash of color can change the entire look of a piece! Looks fantastic! Thank You for sharing your project at the Fluster Buster Party, join us next week with another one of your fantastic tutorials and ideas, Lizy your party co host!
ReplyDeleteWhy are projects so simple in our minds, but so hard to make a reality? I've been going through that with a sewing project... actually almost every sewing project I have ever attempted has turned out that way. I think your framed cork board is awesome... even if it did take a long time to get right.
ReplyDeleteI don't know - it's so frustrating! Everything should be able to come out exactly as we imagine it! I'm glad you like the board! I hope your sewing projects come out the way you imagine them!
DeleteGood for you for not giving up on this one. The end result was well worth the gorgeous result. Thanks for sharing at Inspire Us Thursday on Organized 31.
ReplyDeleteHey, great idea!! I have a couple of those frames that I got on sales at Michaels and now I know what I'm going to use them for,Christmas gifts for my nieces. Sorry your project was such a pain but thanks for sharing your final results.
ReplyDeletePlease link-up this terrific post at our rules free Blog Strut Link Party/blog hop, Thursdays at 5:00 PM PST. Our Blog Strut isn't your average blog hop, it offers many ways to promote and give exposure to your blog and posts. We pin all links, featured posts, as well as offer free co-host spots and button/logo redesign, plus free social network link ups. Join us and show what you’ve got!! http://www.mypersonalaccent.com/linkyparty/
ReplyDeleteAmazing post